Anyone can easily install a grid panel in just a few steps. First, choose a suitable location and prepare your tools. Then, measure, mark, and install the anchors or hooks. For beginners, installing a grid panel (including finishing touches like installation and painting) can typically be completed in just two days. Using sturdy accessories like IDMATE plastic display hooks makes installing grid panels even easier. Simply hang the grid panel, check for level, and enjoy the neat display. Learning how to install grid panels helps in quickly tidying up a space.
Key Takeaways
- Pick the best wall for your grid panel. Drywall, brick, and concrete need different anchors. Each wall type needs its own way to hang the panel safely.
- Measure the space before you hang the panel. Mark where the anchors will go. This helps keep the grid panel straight. It also makes sure it is not too close to walls or furniture.
- Use the right tools for hanging. You will need a drill, a level, and a measuring tape. Use anchors that match your wall type.
- Check your grid panel often to make sure it is safe. Look at the anchors and hooks to stop accidents. This keeps your display looking nice.
- Try IDMATE Plastic Hooks because they are strong and safe. They are simple to put in. They help you organize things on your grid panel.
How to Choose the Best Location for Hanging Grid Panels
Wall type & space
Choosing the right wall is crucial for hanging grid display walls. Drywall, brick, or concrete walls are common in homes and offices. Each wall type requires different hardware and installation methods. Drywall walls are suitable for wall nails and can withstand up to 50 pounds (approximately 23 kg). Concrete walls can withstand even greater weights, sometimes up to 200 pounds (approximately 91 kg) with proper anchors. Brick walls require special care to avoid cracking.
Some wall surfaces have special functions. Decorative panels can add aesthetics, while sound-absorbing panels help reduce noise. Wood panels provide warmth, and metal panels offer strength in high-traffic areas. Before installation, always check the strength and brittleness of the wall. A sturdy wall ensures the stability of the grid panels. Tip: For brick-look panels, it is recommended to choose an interior wall. This helps prevent weathering and maintains the fresh and bright appearance of the display.
Tip: For faux brick panels, choose an interior wall. This helps avoid weather damage and keeps the display looking fresh.
Accessibility & layout
A well-designed layout ensures that everyone can easily access the grid panels. When hanging grid gallery walls, leave sufficient space around the panels. Ideally, there should be at least 78 inches (approximately 198 cm) of vertical clearance in front of the panels. The highest point of the panels should not exceed 79 inches (approximately 190 cm) from the ground. Doors or any moving parts should open at least 90 degrees without bumping into anything.
In addition, lighting should be considered. Good lighting not only enhances the display but also ensures safety. Always keep passageways to the panels unobstructed. No one wants to trip or bump into things.
| Safety Consideration | What to Watch For |
|---|---|
| High-traffic areas | Keep panels away from busy walkways |
| Door swings | Make sure doors open fully without hitting panels |
| Visibility | Use dedicated lighting for better safety |
A well-placed grid panel makes any space more organized and stylish. It also keeps everyone safe and happy.
Essential Tools and Materials Needed for Hanging Grid Panels
Essential tools
To begin installing the grid panel, you’ll need a few basic tools. These tools will make the installation process smoother and easier. Here’s a simple list of tools:
- Electric drill
- Screwdriver
- Level
- Measurement tape
- Pencil
The electric drill is used to drill holes for installing expansion bolts or screws. The screwdriver is used to tighten the hardware. The level is used to check that the grid panel is level. The measurement tape is used to mark the correct positions. The pencil is used to mark the installation positions for the expansion bolts and hooks. These tools are suitable for most home or shop DIY projects.
Tip: Always double-check measurements before drilling. This prevents mistakes and keeps the grid panel looking neat.
Anchors, hooks & display hooks
Anchors and hooks securely fasten mesh panels to walls. Different anchors are chosen based on the wall material (dryboard, brick, or concrete). Wall nails are suitable for dryboard. Heavy-duty anchors are for concrete walls. Brick walls require specialized masonry anchors.
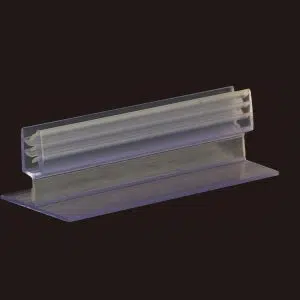
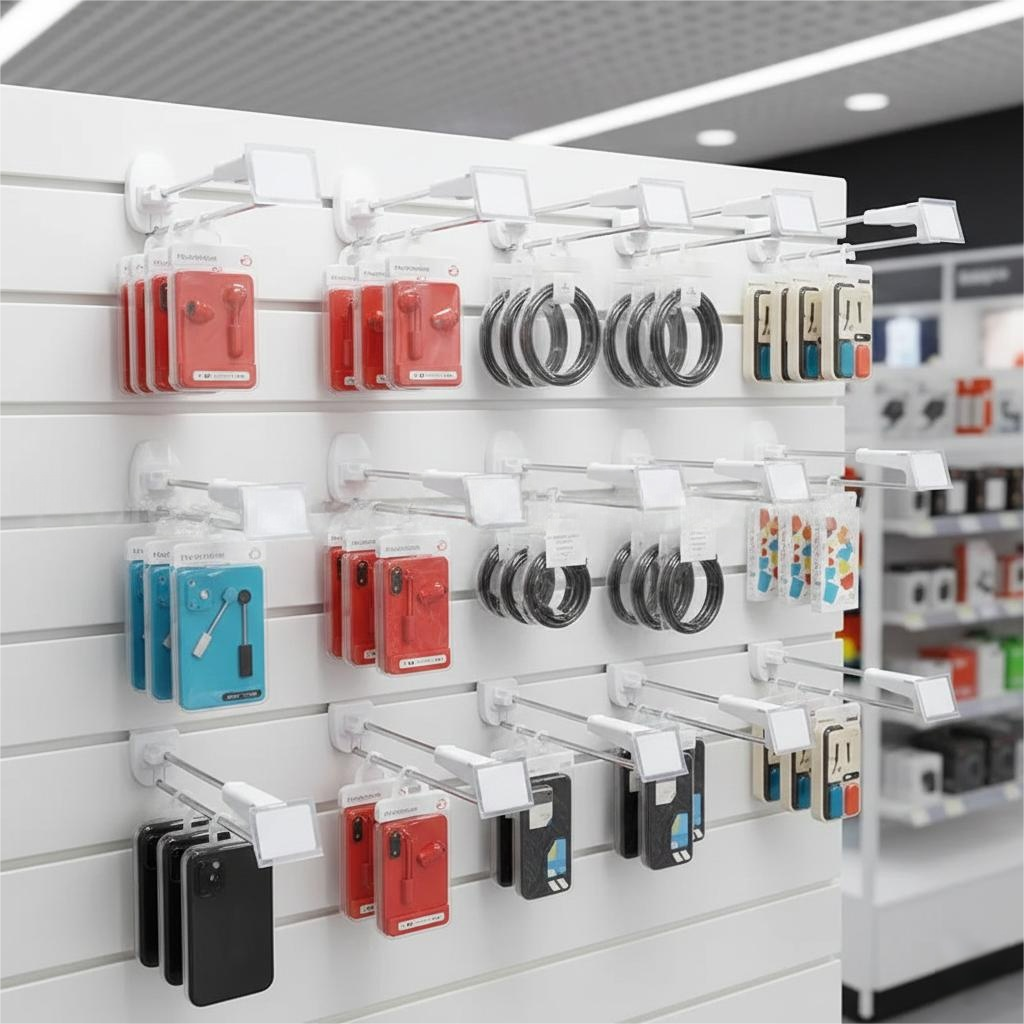
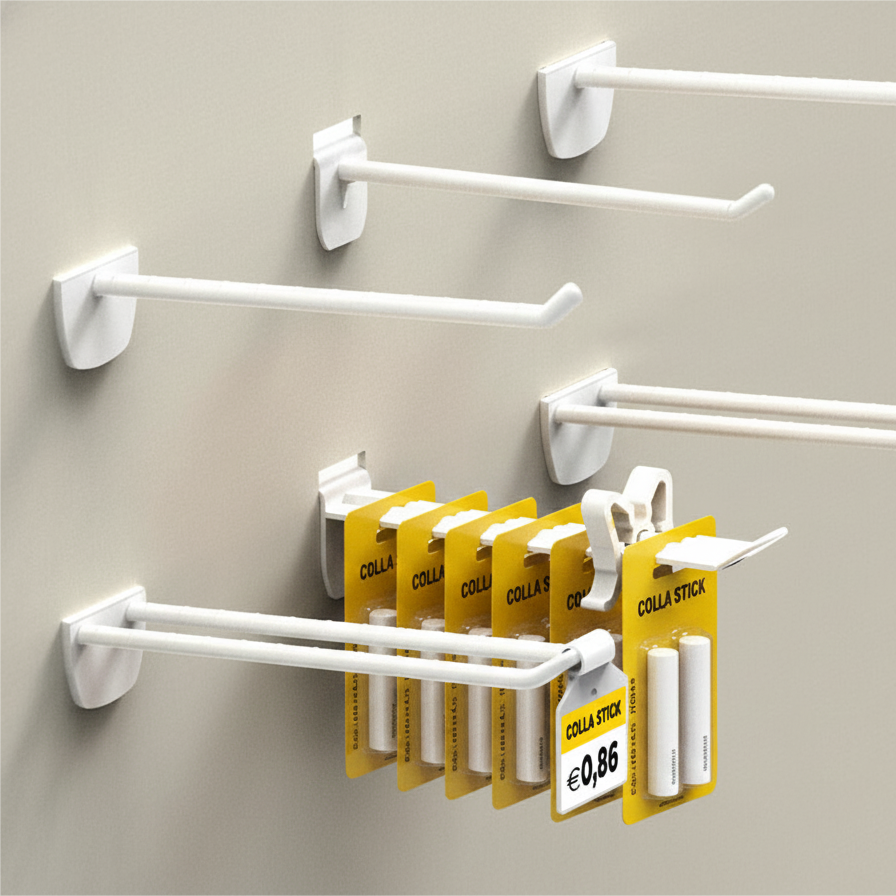
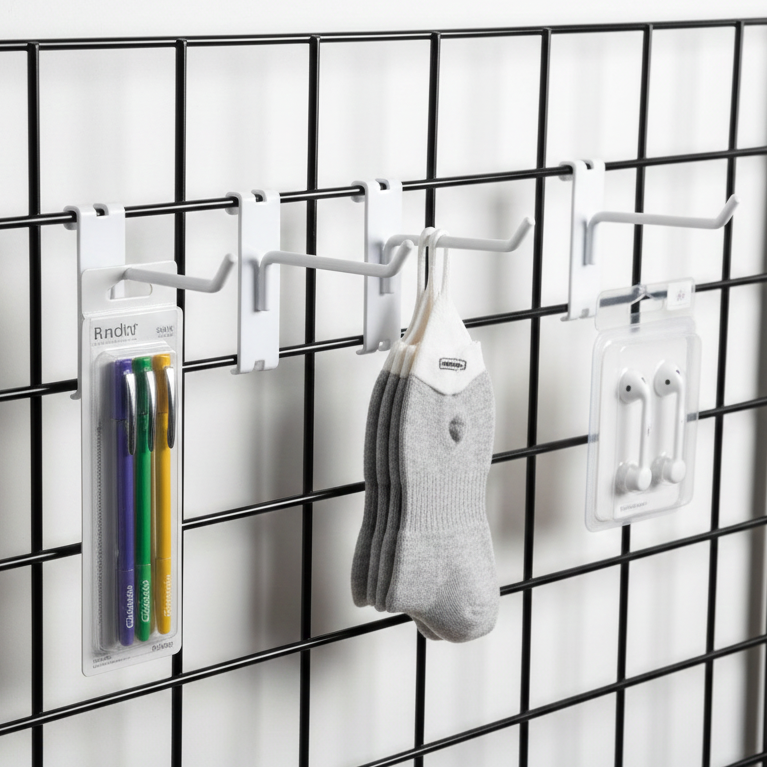
Display hooks help organize items on mesh panels. IDMATE plastic display hooks are ideal. They combine strength, safety, and style. IDMATE hooks are suitable for various wall surfaces, including siding, paneling, and mesh walls. They are popular because they are easy to install and replace.
Here’s a brief overview of why IDMATE plastic display hooks are a smart choice:
| Advantage | Description |
|---|---|
| Lightweight and easy to handle | People can install and replace them quickly. |
| Non-corrosive and rust-free | They stay strong in humid or outdoor spaces. |
| Safe and user-friendly | Smooth edges protect hands and products. |
| Lower cost than metal hooks | They save money for stores and homes. |
IDMATE hooks will not rust or corrode. Their soft surface ensures safety. They are chosen for busy shops and home displays. They are more economical than metal hooks.
Plastic hooks have an environmental impact. Plastic is derived from fossil fuels and decomposes slowly. Most plastics cannot be recycled, contributing to landfill and ocean pollution. People should use hooks responsibly and recycle them whenever possible.
Measuring and Marking the Wall for Grid Panels
Height & spacing
He first determined the hanging height of the grid panel. Most people would place the bottom edge about 48 inches (122 cm) from the ground. This height is suitable for both home displays and store displays. She checked the space above and below the grid panel. Sufficient space would allow her to add hooks or shelves later. He measured the width of the grid panel and left at least 2 inches (5 cm) of slack on each side.
Tip: She used a level to ensure the grid panel was placed horizontally. A tilted grid panel looks cluttered, and items are prone to slipping.
He marked the top and bottom edges of the grid panel with a pencil. She carefully checked the markings twice. Any errors could result in an uneven grid panel. He stepped back a few paces to observe the wall. The grid panel should fit perfectly against the wall space, leaving room for other decorative items.
Mark anchor points
He needed to mark the anchor points. She used a measuring tape to determine the precise locations. To increase support, he placed anchor points at the corners and sides. She checked the mounting holes on the grid panel. He aligned the anchor point marks with these holes.
Some people use more advanced tools to improve accuracy. He tried using a laser rangefinder to measure the distance between the anchor points. She used a total station for high-precision measurements, especially in large rooms. These tools helped him avoid errors and keep the panel level. If the room had a suspended ceiling, she would follow the ceiling’s grid system. This system made measuring offsets much easier.
- He marked each anchor point with a pencil.
- She checked the spacing again with a level.
- For some difficult areas, he used a laser measuring instrument.
- She left the marks in a prominent position for the next step.
Those who enjoy DIY projects will find this step easy, provided the tools are right. He calmly and carefully checked each mark. She knew that careful measurement was essential for creating a sturdy and aesthetically pleasing grid panel.
Installing Anchors and Hooks for Grid Panels
Drywall, brick, concrete methods
People often wonder which method works best for their wall. The answer depends on the wall material. Drywall, brick, and concrete each need a different approach. Here’s a quick look at how they compare:
| Feature | Masonry Walls | Drywall |
|---|---|---|
| Installation Time | Time-consuming | Quick and easy |
| Difficulty | Needs skilled labor | Simple for beginners |
He finds drywall the easiest for most diy projects. She uses wall dog screws or plastic anchors for drywall. These go in quickly and hold strong. For brick or concrete, he drills pilot holes and uses masonry anchors. This takes more time and effort. She always matches the anchor type to the wall. This keeps the grid panel safe and prevents failures.
Tip: He checks the anchor depth before installing. Shallow anchors can pull out and cause the panel to fall.
Secure brackets & zip ties
He uses a mesh support to maintain the panel’s stability. She distributes the supports evenly across the top and sides of the panel to prevent sagging or bending. He avoids applying excessive weight to any single hook. If the panel begins to slip, she adds extra fasteners.
- He checks the hooks and fasteners every few months.
- She immediately replaces any worn or loose parts.
- He never skips the leveling step.
- She avoids overloading any single anchor point.
Cable ties provide an extra layer of security. He threads the cable ties through the mesh and wraps them around the support. She tightens the ties to prevent the panel from shifting. Cable ties are ideal for high-traffic areas or heavy display items.
Note: Regular checks and smart spacing keep the grid panel safe for everyone.
How to Properly Hang and Secure Grid Panels on Your Wall
Attach & level
He first picked up the grid panel and aligned it with the anchor points on the wall. She checked the markings she had made earlier, then placed the grid panel in place, ensuring the mounting holes aligned with the hooks or brackets. He carefully lifted the grid panel, being careful not to scratch the wall or damage the anchor points. She slid the grid panel onto the hooks and then stepped back a few paces to check that it was level.
A level can help him check if the grid panel is vertical and level. She placed the level at the top edge of the grid panel and observed the bubble. If the bubble remained centered, the grid panel was level. If the grid panel was tilted to one side, he would make slight adjustments. She repeated this process, installing both vertically and horizontally. Some people prefer to hang grid panels vertically to display tall items, while others prefer horizontal installation to cover a larger space.
Tip: He always checks the panel from different angles. She uses a level for both directions to avoid crooked displays.
Here’s a simple step-by-step guide to hanging a grid panel:
- Choose a suitable location for the panel.
- Prepare tools such as a level, measuring tape, pencil, and expansion bolts.
- Measure and mark the wall surface for installing the expansion bolts.
- Install the expansion bolts or hooks according to the weight of the panel.
- Hang the grid panel and check it’s level with a level.
He found these steps simple for most DIY projects. She liked this method because it kept the display neat and organized.
Check stability
He gently pressed different parts of the mesh panel to test its stability. She listened carefully for any wobbling or creaking. If the panel shifted, he would tighten the hooks or add supports. She checked the anchors to ensure they were securely fastened to the wall. He avoided placing heavy objects on the panel immediately.
Common causes of panel instability include loose anchors, uneven installation, or overloaded hooks. She checked the panel regularly, especially in high-traffic areas. For added security, he used cable ties, threading them through the mesh and wrapping them around the supports. She preferred IDMATE plastic display hooks because they remained secure and safe even in wet or outdoor environments.
| Stability Check | What to Do |
|---|---|
| Loose anchors | Tighten or replace them |
| Panel movement | Add brackets or zip ties |
| Overloaded hooks | Spread weight evenly across the panel |
| Uneven mounting | Re-level and adjust anchor points |
He keeps the grid panel safe by following these checks. She knows a stable panel prevents accidents and keeps the display looking sharp. He reminds everyone to check that the panel is plumb and level after hanging. She likes that panels can be mounted vertically or horizontally, depending on the space and style.
Note: Regular maintenance and smart mounting help hang grid panels securely. He enjoys the flexibility and organization that grid panels bring to any room.
Hanging grid panels is easy and only takes a few steps. He can do the job fast if he has the right tools and plans ahead. Grid panels help keep things neat and add style to any room. They also let you change your setup when you want. Some popular accessories are:
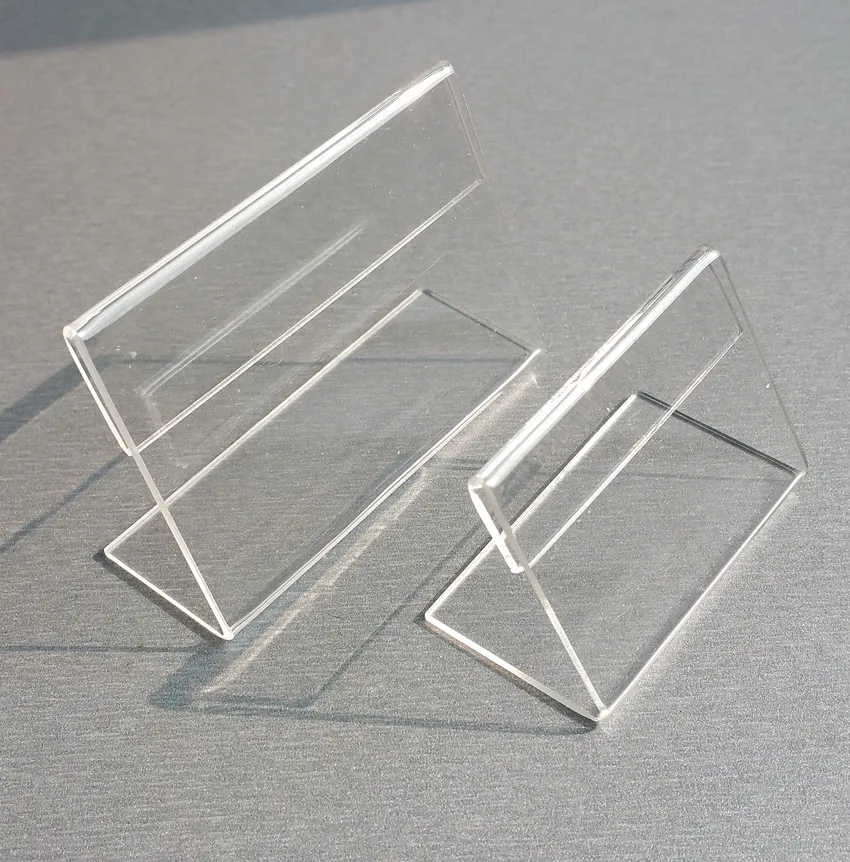
- Hooks
- Shelves
- Baskets
- Faceouts
- Waterfalls
- Hangrail brackets
- Hat displays
- Literature holders
The accessories you pick turn a plain wire grid into a useful selling tool. You can make your display fit the products you want to show. There are so many ways to set it up.
She likes IDMATE Plastic Display Hooks because they are strong and safe. He likes that these hooks make it simple to organize any space.
FAQ
How much weight can a grid panel hold?
Grid panels can hold a lot of weight if installed with strong anchors and brackets. Most panels support 50 to 100 pounds. He should always check the wall type and use the right hardware for safety.
Can someone hang grid panels on brick or concrete walls?
Yes, she can hang grid panels on brick or concrete. She needs masonry anchors and a drill with a masonry bit. These anchors keep the panel secure and prevent it from falling.
What tools does he need to hang a grid panel?
He needs a drill, screwdriver, level, measuring tape, and pencil. These tools help him measure, mark, and install the panel. He can also use zip ties or brackets for extra support.
Are IDMATE Plastic Display Hooks safe for kids’ rooms?
Yes, IDMATE Plastic Display Hooks have smooth edges and soft surfaces. They help prevent injuries and keep items safe. Parents like them for kids’ rooms because they do not rust or corrode.
Can she move a grid panel after installing it?
She can move a grid panel by removing the anchors and hooks. She should patch any holes left in the wall. Then, she can repeat the steps to hang the panel in a new spot.