People often ask what they need to secure a pegboard plastic hooksto a wall. The right tools and materials ensure a safe installation and a stable, secure pegboard. Using strong fasteners, washers, and a good drill can effectively prevent accidents and keep the pegboard from shifting.
Beginners and DIY enthusiasts often think this project is easy as long as they have the materials. However, safety and stability are paramount, so choosing the right materials is crucial.
Key Takeaways
- Choose sturdy materials such as cardboard or plywood. These materials are more durable and have a higher load-bearing capacity. Use appropriate tools such as a drill, level, and wall sensor. This will help you install the plastic pegboard hooks safely and correctly. Leave space on the back of the pegboard using wooden strips or washers. This allows for easy installation and movement of hooks. Always check the pegboard’s load-bearing capacity. Use appropriate fasteners to prevent it from falling or getting damaged. After installing the pegboard, gently pull on it to test its stability. If it feels loose, add more screws or brackets.
Materials and Tools to Attach Pegboard
Essential Materials List
Anyone can start making a pegboard as long as they have the right materials. These items help keep the pegboard stable and secure. Here are the materials needed:
- Pegboard (hardboard or plywood is the strongest)
- Wooden strips or slats (to leave gaps for hooks)
- Screws (wood screws for wall posts, masonry screws for brick or concrete walls)
- Wall anchors (for drywall or hollow walls)
- Washers (if not using wooden strips)
- Pegboard clips or brackets
- Cable ties (for extra reinforcement in some cases)
- Strong glue (optional, for enhanced adhesion)
Hardboard and plywood are stronger and last longer even with frequent hook moves. Plastic and medium-density fiberboard (MDF) pegboards are suitable for hanging light items, but wooden pegboards can remain sturdy and durable for years.
Recommended Tools
The right tools make the job easier and safer. Here are some essential tools:
- Electric drill and drill bits
- Screwdriver (manual or electric)
- Level (for keeping the wall panel level)
- Measurement tape
- Pencil or marker (for marking positions)
- Wall detector (for locating wall posts)
- Safety goggles
A level helps keep the wall panel level. A measurement tape ensures the wall panel is the correct size. Safety goggles protect your eyes from dust and debris.
Choosing Fasteners and Spacers
Fasteners and washers are crucial for ensuring the wall panel is secure and functional. Plastic peg hooks and wall anchors are commonly used to secure the wall panel. Wall anchors are best suited for drywall or hollow walls. Wood screws are used to secure wall posts or joists. For brick or concrete walls, masonry screws can be used.
Joists or washers leave a gap between the wall panel and the wall. This gap allows hooks to slide in and out easily. You can use wooden strips, plastic washers, or even thick washers. The gap should be at least 1/2 inch (approximately 1.3 cm).
Tip: A gap behind the pegboard is important. Without it, hooks will not fit or stay in place.
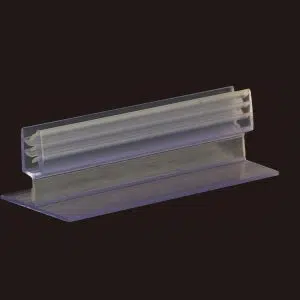
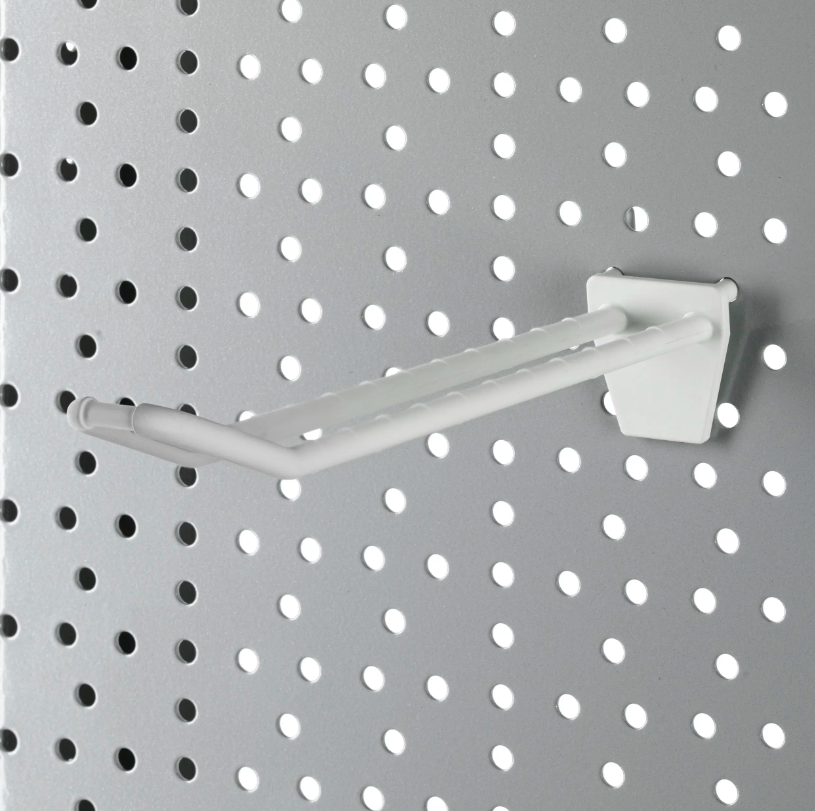
Speaking of hooks, IDmate pegboard plastic hooks are suitable for most pegboards. These hooks are easy to install and can hang a variety of items. They are perfect for tools, crafts, or shop displays. Their unique design prevents items from slipping and won’t scratch the pegboard.
People can mix and match different styles of hooks to suit different needs. Anyone can secure a pegboard to the wall and keep items organized by using the right fasteners, washers, and hooks.
How to Hang a Pegboard on the Wall
Measure and Mark the Wall
Every project begins with planning. Before picking up any tools, they should first decide on the location of the mounting plate. A measuring tape can help find the right spot. They can lean the mounting plate against the wall and mark the four top corners with a pencil. This step ensures the mounting plate is level and correctly positioned.
A level can ensure the lines are straight. If the mounting plate is large, they can ask a friend for help. They should mark the installation positions of the wooden strips or shims. These marks indicate the installation positions of the mounting plate brackets. Accurate measurements ensure the mounting plate is not crooked.
Tip: Always double-check the marks before drilling. Small mistakes can make mounting harder later.
Attach Furring Strips or Spacers
The wooden strips or shims will create a gap behind the mounting plate. This gap allows hooks to slide in and out easily without hitting the wall. They should cut the wooden strips or shims to the same height as the mounting plate. Most people use wooden strips, but thick plastic shims can also be used.
They need to align the wooden strips or shims with the markings on the wall. Screws are used to secure the wooden strips. If the wall has a joist, screws should be screwed into the joists for added stability. If it’s a drywall wall, wall anchors must be installed first. Wall anchors prevent the wood strips from coming loose. Ensure the wood strips are secure before proceeding to the next step.
Note: The gap should be at least 1/2 inch. This space helps hooks fit and keeps the board from bending.
Mount the Pegboard Securely
Now you can install the pegboard. The board should be placed against the joists or washers. The holes in the pegboard should align with the wood strips. Screws can be drilled through the board and screwed into the wood strips. If the screws are not screwed into the joists, use wall anchors for support.
Step-by-step installation helps avoid mistakes. Start from the top corner and then add screws along the sides and bottom. This will ensure the board fits snugly against the wall. For heavier boards, using more screws provides better support.
Step-by-step installation means checking each screw before moving to the next. This keeps the board safe and steady.
After installation, gently pull the board to test it. If it feels loose, add more screws or check the expansion bolts. Once the board is secure, hang a hook to test for gaps. If the hook fits properly, the installation is successful.
Sturdy pegboards make tidying up easy. Pegboards can be installed in garages, workshops, and even craft rooms. Anyone can install pegboards and enjoy a tidy space with the right tools and proper technique.
Mount a Pegboard on Different Wall Types
Drywall Installation
Plasterboard is common in many homes. People often want to install pegboards in garages or craft rooms with existing drywall. First, locate the joists behind the wall. A joist detector can help with this step. Once the joists are located, use wood screws to secure them. This provides a strong support for the pegboard.
If the board is not aligned with the wall post, use wall anchors. Wall anchors firmly hold screws in place. First, drill a small hole and then hammer the wall anchor into place. After that, you can screw the board onto the wall anchor. This method ensures the hanging panel is stable and secure.
Tip: Always check the weight limit for drywall anchors. Heavy items need stronger support.
Concrete or Brick Walls
The installation method differs for concrete and brick walls. Ordinary screws are ineffective on these materials. Masonry screws or wall anchors specifically designed for concrete should be used. Using an impact drill will make it easier. First, you need to drill holes in the concrete or brick wall.
After drilling, insert the wall anchor. Then, secure the hanging panel to the wall anchor with screws. This method prevents the hanging panel from falling off the wall. Concrete walls have a strong load-bearing capacity, so heavier tools or items can be hung.
Note: Dust from drilling into concrete can be messy. Safety goggles protect eyes during this step.
Stud vs. No-Stud Mounting
Wall posts are the best support points for installing pegboards. If a wall post is found, use wood screws to secure it, ensuring the pegboard is firmly in place. If no wall post is available, wall anchors are the next best option. Wall anchors distribute weight across the wall, preventing the pegboard from slipping off.
Always check the wall type before installation. Dryboard, concrete, and brick walls require different fasteners. Proper installation ensures the pegboard is safe, reliable, and ready for immediate use.
Tips to Install a Pegboard Safely
Weight Capacity and Safety
Safety is always the top priority when installing pegboards to a wall. Always check the pegboard’s load-bearing capacity before placing items on it. Most pegboards have labels or guidelines indicating their load-bearing capacity. Use sturdy brackets and strong screws during installation. If the wall has a wall post, screw the screws into the post for added support. If no wall post is available, wall anchors are very useful. To prevent the pegboard from sagging, install the brackets evenly. Heavier tools or items will require additional brackets for secure support.
Tip: After installation, be sure to gently pull the pegboard to test it. If it feels loose, add more brackets or check the screws.
Accessory Compatibility
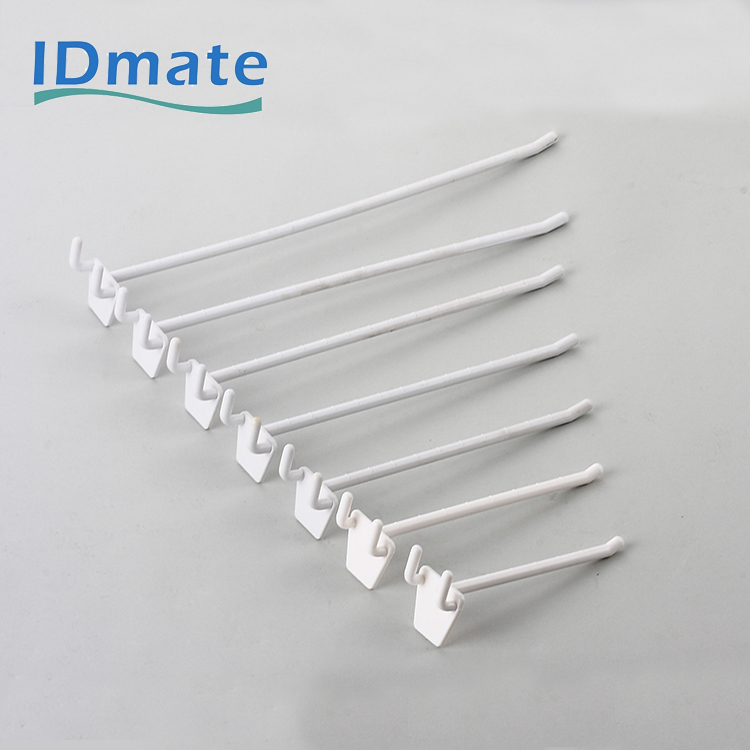
Choosing the right accessories is crucial for the effectiveness of your pegboard. Users should select hooks and brackets that match the pegboard’s hole diameter. IDmate pegboard plastic hooks fit most standard pegboards and securely hold a variety of items. Here are some common hooks and holders for standard pegboards:
- Standard Slotted Hooks (6-pack) – 7/8 inch (approx. 2 cm) long
- Medium Slotted Hooks (4-pack) – 1-7/8 inch (approx. 4 cm) long
- Medium 90-degree Corner Slotted Hooks (4-pack) – 1 inch (approx. 2.5 cm) long
- Paintbrush Hooks and Spool Holders (4-pack) – 3.5 inch (approx. 9 cm) long
- Long Slotted Pegboard Hooks (4-pack) – 2-7/8 inch (approx. 7 cm) long
- Elbow Slotted Pegboard Hooks (4-pack) – 3-1/2 inch (approx. 9 cm) long
- Extended Slotted Pegboard Hooks (2-pack) – 6 inch (approx. 15 cm) long
- Extended Slotted Pegboard Hooks (2-pack) – 9 inch (approx. 23 cm) long (cm) Length
The compatibility of accessories affects safety and storage effectiveness. The table below shows how suitable brackets and hooks work:
| Aspect | Benefit |
|---|---|
| Organization | The right accessories keep items neat and easy to find. |
| Safety | Secure brackets and hooks prevent accidents and damage. |
| Flexibility | People can move brackets and hooks to fit new items or change displays. |
| Load capacity | Different materials and brackets hold different weights, so people should check limits. |
Troubleshooting Common Issues
Some problems may occur during installation. Here are some quick solutions:
- If the pegboard feels wobbly, tighten the brackets and screws.
- If the hooks don’t fit, check if the hole diameter of the pegboard matches the bracket size.
- If the pegboard is sagging, add more brackets or use sturdier brackets.
- If the wall is uneven, use shims behind the brackets to keep the pegboard level.
Most problems can be solved with a few simple adjustments. A sturdy pegboard with a suitable bracket ensures tools and supplies are stored safely and orderly.
Installing a pegboard is simple; just follow these steps. First, measure your wall dimensions and mark the installation location. Next, select appropriate fasteners based on your wall type. Afterward, check that the pegboard is secure and won’t move. A good installation ensures tool safety and keeps your space tidy. The table below explains the importance of proper pegboard installation:
| Factor | Importance |
|---|---|
| Weight Capacity | Stops the board from breaking or falling down. |
| Balanced Hook Placement | Makes the board steady and keeps the wall safe. |
| Fastener Spacing | Helps the board stay flat and hold weight. |
| Regular Maintenance | Makes sure the pegboard stays safe for a long time. |
Some popular accessories are:
- Pegboard hooks for hanging tools
- Shelves for holding cans
- Brackets for more storage
Do you have a question or tip? Tell us your pegboard story in the comments!
FAQ
How much weight can a pegboard support?
Most pegboards, when installed with strong screws and expansion bolts, can support 50 to 100 pounds (approximately 23 to 45 kg). Heavier items require additional support. Be sure to check the manufacturer’s guidelines for the exact weight limits.
Can I install a pegboard without using wall posts?
Yes, you can use wall posts for support. Wall posts help securely hold the pegboard to the drywall. For heavy tools, wall posts provide better support.
What size hooks are suitable for standard pegboards?
Standard pegboards use 1/4-inch (approximately 6 mm) or 1/8-inch (approximately 3 mm) hooks. IDmate pegboard plastic hooks fit most pegboards and are available in various sizes to meet different needs.
How can I prevent hooks from falling off?
You should choose hooks with locking claws or a loop design. These hooks will not fall off when people are taking or putting away items. IDmate’s hooks are sturdy and reliable, suitable for high-traffic spaces.
Can pegboards be installed in damp places, such as basements?
Yes, but plastic or coated metal pegboards perform best in humid environments. Wooden boards may warp over time. Always check the humidity before installation.