Installing acrylic signage using standoffs is remarkably simple—anyone can do it with ease. First, select a high-quality signage mounting kit. IDmate acrylic sign holders securely fastened. The installation process is straightforward: simply take measurements and mark the desired locations on the wall.
| Factor | Description |
|---|---|
| Sign weight | Heavy signs need standoffs to hold them up. |
| Location | Outdoor signs use standoffs to stay strong. |
| Wall surface | Standoffs work best on rough walls. |
| Aesthetics | Standoffs make signs look cool and modern. |
If you follow these steps, your sign will look great. It will stand out and look professional.
Key Takeaways
- Pick standoff hardware that fits your sign’s size and weight so it stays safe.
- Measure and mark spots before you drill to keep your sign level and straight.
- Wear gloves and follow safety rules when you install to stay safe from harm.
- Clean your acrylic sign often with gentle soap to keep it clear and looking nice.
- Check the standoffs every few months to make sure they are tight and will hold your sign up for a long time.
Comprehensive Overview of Standoffs for Mounting Acrylic Signs
What are standoffs?
Standoffs are small hardware components designed to create a gap between a sign and the wall on which it is mounted. They serve a dual purpose, acting as both spacers and fasteners. Standoffs are commonly used to install acrylic signage, preventing the sign from sitting flush against the wall. This mounting method creates the visual illusion that the sign is “floating” off the wall surface. This floating aesthetic offers a look that is both modern and stylish.
Standoffs are available in a wide variety of materials. Below are several of the most common materials used for signage, along with brief descriptions:
| Material | Description |
|---|---|
| Aluminum | Light, strong, does not rust, comes in many finishes. |
| Brass | Looks fancy, does not rust or tarnish, good for wet places. |
| Acrylic | Light, makes signs float, good for modern looks, protects surfaces. |
Standoffs do more than just hold up a sign. They are part of the design. Many people pick standoff mounted signs for offices, stores, and restaurants. They want a clean and professional look.
Why use standoffs for acrylic signs?
Using standoffs to mount acrylic signage offers numerous advantages. It allows the sign to project outward from the wall, thereby enhancing visual depth and dimensionality, which in turn more effectively captures people’s attention and draws the eye. This “floating” design aesthetic makes the signage particularly striking and memorable.
Standoffs not only serve a fastening function but also enhance the sign’s structural stability; simultaneously, they constitute an integral part of the sign’s overall aesthetic design. The gap created by the standoffs between the sign and the wall helps protect the sign from scratches, impacts, and moisture damage. Consequently, for signage that is critical in nature or requires frequent content updates, this mounting method represents an excellent choice.
Here are some reasons people choose standoffs for their signs:
- Give strong support
- Make signs look better
- Make updates and cleaning easy
- Keep the sign safe from harm
Standoffs also let air move behind the sign. This helps stop mildew and warping, especially in damp places. Standoffs need more parts and careful setup than snap-fit or clip mounting. But they hold signs better and last longer.
People who want their signs to look nice and stay safe use standoffs. These signs work well in busy places and keep the message clear for everyone.
Tools and Materials for Acrylic Sign Installation
Essential tools for mounting
Provided you have the right tools at your disposal, you can easily handle the installation of your acrylic signage yourself. Preparing all necessary items in advance will make the entire installation process much smoother and more effortless. The table below lists the various tools required and their specific functions:
| Tool/Preparation Step | Purpose |
|---|---|
| Level | For precise alignment |
| Measuring tape | For accurate measurements |
| Pencil | To mark mounting points |
| Drill and drill bits | For creating holes for mounts/anchors |
| Wall anchors | Essential for drywall or heavy signs |
| Mounting hardware | Standoffs, screws, bolts, etc. |
| Protective gloves | Safety during handling/installing |
| Clean and inspect surface | Ensures wall is moisture- and debris-free |
You should measure and mark where the standoffs go before you drill. Using a level helps keep the sign straight. Gloves keep your hands safe from sharp edges.
Choosing the right standoff hardware
Picking the right standoff hardware is important. Thicker acrylic panels are stronger and do not bend easily. Bigger signs need thicker panels and more standoffs to stop them from breaking. Standoffs help hold up the sign, but the thickness matters too. Some materials, like Alumalite or Diabond, need fewer standoffs because they stay flat. Match the standoff hardware to the sign’s size and weight for the best results.
Tip: Most signs need at least four standoffs. Bigger signs may need more for extra support.
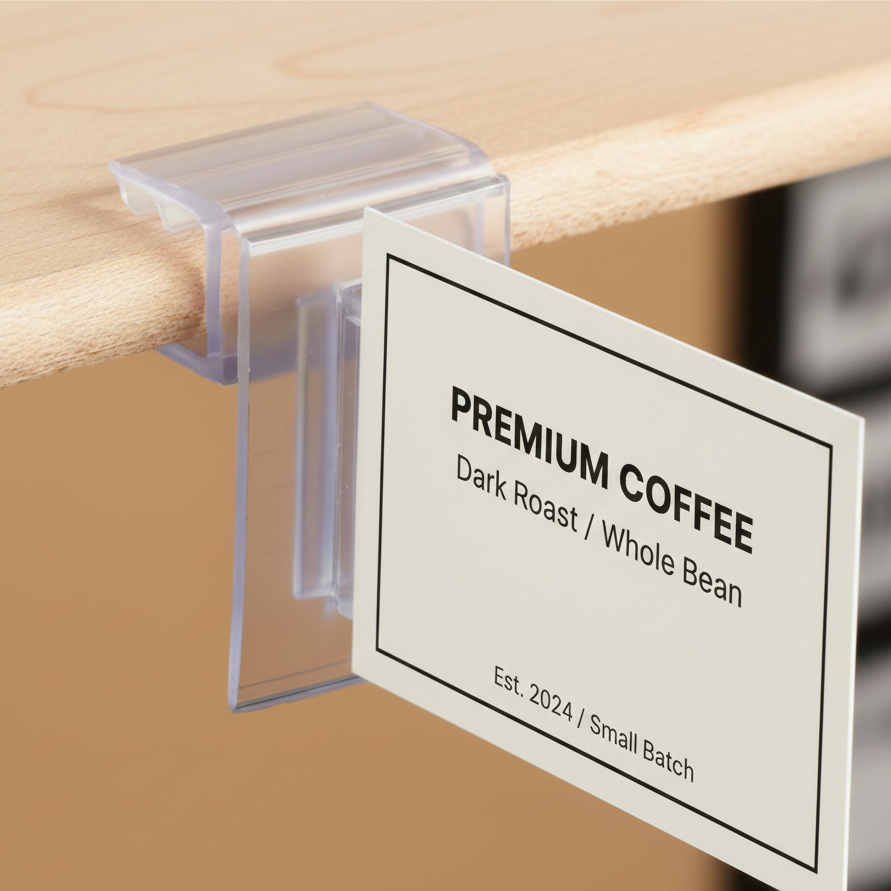
IDmate Acrylic Sign Holder features
The IDmate Acrylic Sign Holder is easy to see and use. People can read the sign without any problems. It installs fast and fits in many places, like stores, offices, or restaurants. It uses strong materials that protect the sign and keep it looking good. The table below shows some important features:
| Feature | Description |
|---|---|
| Clear Visibility | Customers see messages easily and clearly |
| Easy to Use/Install | Quick setup on different surfaces |
| Durable/Lasting | High-quality materials resist damage and keep a neat look |
| Fits Multiple Scenes | Works in retail, restaurants, offices, and more |
Picking a strong and clear sign holder, like IDmate, helps businesses keep their signs looking nice and new.
Step-by-Step Acrylic Sign Installation

Measuring and marking for standoffs
Every great sign display starts with careful measuring and marking. People who want to mount an acrylic sign should always begin by picking the perfect spot. They look for a flat, visible area with good lighting. Next, they measure the width and height of the wall space. This helps them choose the right sign size for the area.
After deciding on the sign’s orientation, they mark the center point. They use a tape measure and a level to make sure everything lines up straight. For standoff mounted signs, they measure about one inch in from each corner. This is where the standoffs will go. Larger signs need more standoffs, usually one every three feet, to keep the sign from bowing or falling.
Tip: Double-check all measurements before drilling. A small mistake can lead to crooked signs or extra holes in the wall.
Drilling holes in wall and acrylic sign
Drilling is the next big step in the installation process. People start by cleaning the wall and making sure it is dry and smooth. They use a pencil to mark the exact spots for each standoff. A level helps keep the marks even.
When drilling into the wall, they use a drill bit that matches the size of the standoff hardware. For most mounting methods, a 3/8-inch bit works well. If the wall is drywall or concrete, they add wall anchors for extra support. For the acrylic sign, they place it on a stable surface. They start with a small pilot hole and slowly increase to the final size. This helps prevent cracks in the acrylic.
- Always use pre-drilled holes if the sign has them.
- Never overtighten screws, as this can damage the acrylic.
- For heavy signs, wall anchors are a must.
Installing standoff supports
Now it’s time to install the standoff supports. People align the drilled holes in the wall with the anchors. They screw the standoff barrels into the anchors, making sure each one is tight and secure. For standoff mounted signs, balanced placement is key. This keeps the sign from tilting or falling.
They gently lift the acrylic sign and line up the holes with the standoffs. The sign should sit flat against the supports. If the sign is large, they ask for help to hold it steady. This step makes the installation safe and easy.
Note: For most signs, four standoffs—one in each corner—work well. Larger signs may need six or more to prevent sagging.
Securing the acrylic sign holder
The last step is securing the acrylic sign holder. People slide the sign into the IDmate Acrylic Sign Holder, making sure it fits snugly. They attach the front caps of the standoffs, but they do not overtighten. This keeps the acrylic sign safe from stress cracks.
Before finishing, they step back and check the sign from different angles. The sign should look level and straight. They remove any protective film and wipe the surface with a microfiber cloth. This gives the sign a clean, professional look.
- Choose a mounting method that matches the sign’s weight and size.
- Avoid textured or uneven walls for best results.
- Always check for loose hardware after installation.
People who follow these installation methods get a secure, attractive display. The IDmate Acrylic Sign Holder makes updates easy and keeps the sign looking sharp. With the right tools and a little care, anyone can mount an acrylic sign with standoffs and enjoy a modern, floating effect.
Acrylic Sign Professional Finish Tips
Ensuring level and alignment
Everyone wants their sign to look straight and professional. They can start by planning the installation. This helps with layout and makes the display look neat. People measure the surface area to make sure the sign fits well. Many installers create a paper template as a guide. They tape the template to the wall and use a level to check for straightness. Before drilling, they double-check the alignment. This step keeps the sign from looking crooked.
Tip: Looking at the sign from different angles helps spot any mistakes before finishing the job.
Avoiding cracks and damage
Acrylic signs can crack if handled the wrong way. People often choose thicker acrylic, at least 4.5mm, to prevent breaks when using standoffs. They use plastic washers on both sides of the sign to help with expansion and contraction. Backing off the cap a half turn also reduces stress on the acrylic. These small steps keep the sign safe and looking new.
- Use thicker acrylic for strength.
- Add plastic washers for extra protection.
- Do not overtighten the standoff caps.
Final checks for secure installation
Before calling the job done, installers do a few final checks. They look at the sign from several angles to make sure it sits level. If something looks off, they adjust it right away. After installation, they peel off any protective film. A microfiber cloth and mild soap work well for cleaning. Ammonia-based cleaners can damage the acrylic, so people avoid those. In busy areas, they check the mounting hardware often for loosening or corrosion. Regular cleaning and inspection keep the sign looking sharp and secure.
Note: A good routine helps the sign last longer and stay safe for everyone.
Acrylic Sign Maintenance
Cleaning and care
Acrylic signs look best when they are clean and clear. People use mild dish soap and warm water to wash them. This gentle mix gets rid of dust and fingerprints. It does not hurt the acrylic. Some people use special acrylic cleaners. These cleaners help protect the sign and keep it shiny. They do not use harsh chemicals like ammonia. Ammonia can damage the sign.
Here are some tips for safe cleaning:
- Spray the cleaning mix on the sign.
- Choose soaps without strong smells or harsh stuff.
- Wipe the sign with a soft, lint-free cloth.
- Use gentle cleaning to keep the acrylic smooth.
Most businesses clean their acrylic signs every month or two. This helps the sign stay bright and easy to read.
People who clean their signs often keep them looking new. They also stop dust and dirt from building up.
Inspecting and tightening standoffs
Regular checks help keep acrylic signs safe and secure. People look at the mounting hardware every few months. They check for loose screws or rust. If a standoff is loose, they tighten it with a screwdriver. This keeps the sign from shaking or falling.
A good maintenance routine includes:
- Checking standoffs and mounts every three months.
- Looking for rust or worn parts on the hardware.
- Tightening any loose pieces right away.
- Doing more checks in busy places.
Tip: A quick check can stop big problems later. People who do regular maintenance have signs that last longer and always look nice.
Mounting an acrylic sign with standoffs is easy if you follow the steps. First, measure the spot for your sign. Next, drill holes in the wall. Then, secure the sign to get a neat, modern look. Picking a good product like the IDmate Acrylic Sign Holder gives you many perks:
| Benefit | Description |
|---|---|
| Durability | Handles daily use and tough weather without breaking. |
| Clarity | Makes messages simple to read and grabs attention. |
| Versatility | Works for menus, price tags, and branding anywhere. |
People say the IDmate holder stays clear and strong, even in busy places. Anyone can make their sign look professional by using this guide. If you have questions or want to share your story, reach out!
FAQ
How many standoffs does an acrylic sign need?
Most signs use four standoffs, one in each corner. Larger signs need more for extra support. He should check the sign size and weight before deciding.
Can someone install an acrylic sign without professional help?
Yes, anyone can install an acrylic sign with standoffs. They just need basic tools and follow the steps in the guide. The process is simple and safe.
What should he do if the acrylic sign cracks during installation?
He should stop and check the damage. If the crack is small, he can use a plastic washer for support. For big cracks, he needs a new sign panel.
How often should they clean an acrylic sign?
They should clean the sign every one or two months. Regular cleaning keeps the sign clear and easy to read. A soft cloth and mild soap work best.
Does the IDmate Acrylic Sign Holder fit different sign sizes?
Yes, the IDmate Acrylic Sign Holder comes in many sizes and styles. He can pick the one that matches his sign and display needs.