Installing a slatted wall may seem simple, but mastering the correct installation method is crucial. Using sturdy tools and skillful techniques ensures a safe and stable slatted wall. Many installers follow these key steps:
- Secure the slatted wall vertically to the wall posts for secure support.
- Screw the screws through the grooves into the wall for a clean, secure installation.
Anyone wanting to learn how to install a slatted wall can easily accomplish this task by planning ahead and keeping a steady hand.
Key Takeaways
- Secure the slatted wall to the wall posts for secure support. This maintains the stability of the wall and prevents sagging later.
- Use a level to ensure the slatted wall is vertical. A vertical slatted wall not only looks better but also saves rework time.
- Prepare tools such as a wall post detector, drill, and safety goggles before starting installation. Having everything prepared makes the work easier and safer.
- Choose the appropriate screws and adhesive based on the wall type. Choosing the right materials is essential for building a strong and durable slatted wall.
- Plan the layout and measure twice. Careful planning helps avoid mistakes and ensures a neat and aesthetically pleasing final result.
Tools and Materials for Slat Wall Installation
Essential Tools Checklist
Installers need the right tools to work safely. These tools help keep panels straight and tight. Here is a simple list:
- Tape measure
- Level
- Stud finder
- Drill and drill bits
- Screwdriver
- Saw (for trimming panels)
- Pencil or marker
- Safety goggles
Tip: A level helps you avoid crooked panels. It also saves time because you do not need to fix mistakes.
Materials Needed
Choosing the right materials is essential for building a strong and durable slatwall peg hooks. Here are the tools most installers commonly use:
- Installation screws (usually 8 or 10 gauge, 2.5-3 inches long)
- Construction adhesive
- Edge trim strips
- Lath wall panels
Different adhesives are suitable for different surfaces. Here is a brief comparison table of commonly used brands:
| Brand | Description |
|---|---|
| Loctite PL Premium | Sticks to wood, drywall, concrete, and metal. It is tough and works for many jobs. |
| 3M 4200 & 5200 | Makes strong, bendy bonds. 4200 is for inside, 5200 is for outside. |
| F-26 Construction Adhesive | Makes a lasting hold on many things. Good for both looks and strength. |
| Titebond | Fast Grab FRP Adhesive. Works well on drywall and rough surfaces. |
| IZODEKOR | Grabs fast. Good for heavy panels and bumpy walls. |
| Liquid Nails | Holds heavy things well. Great for paneling jobs. |
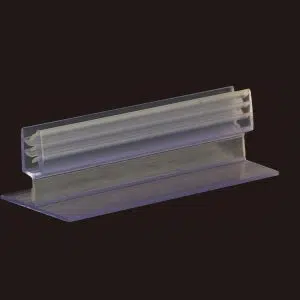
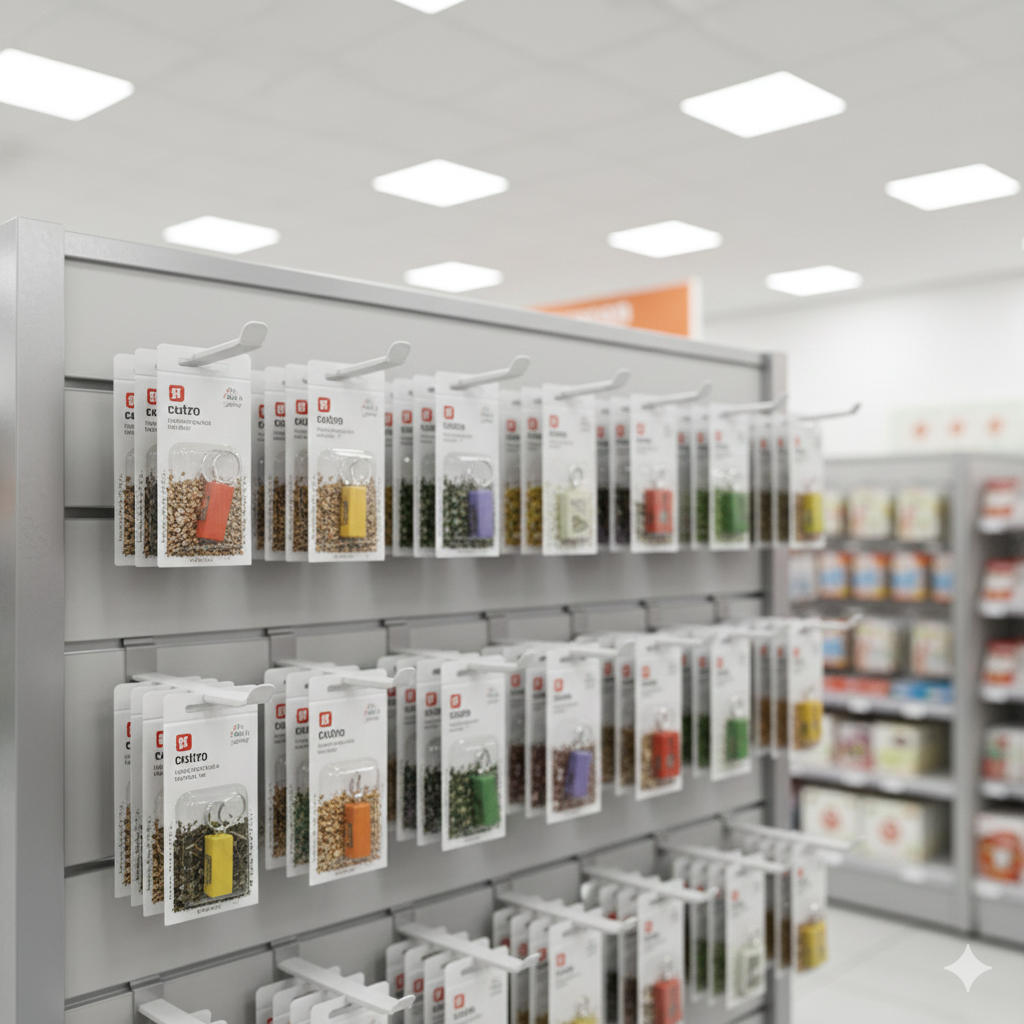
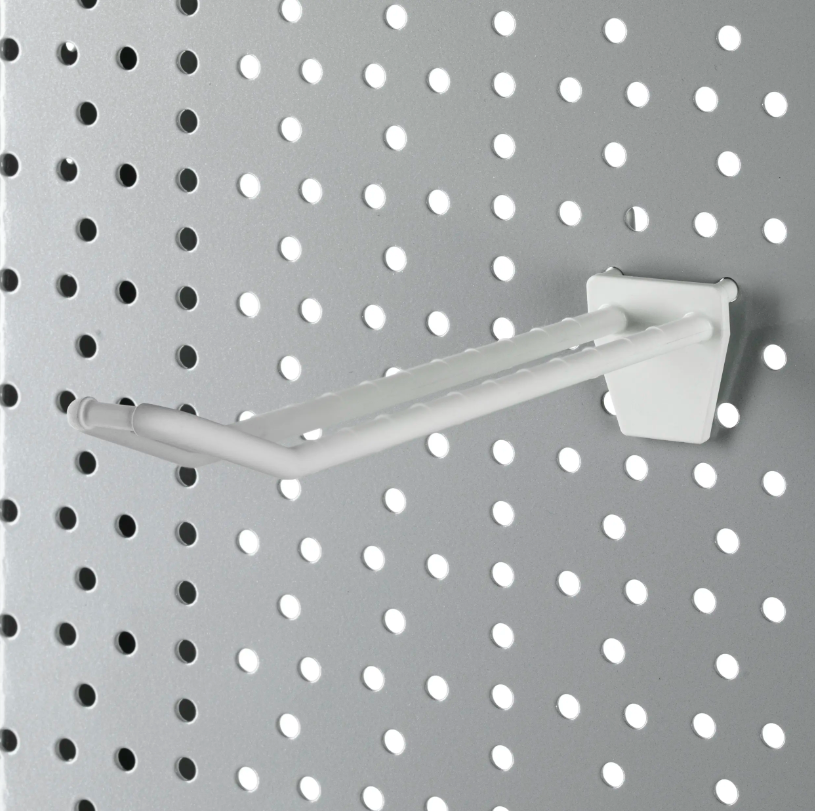
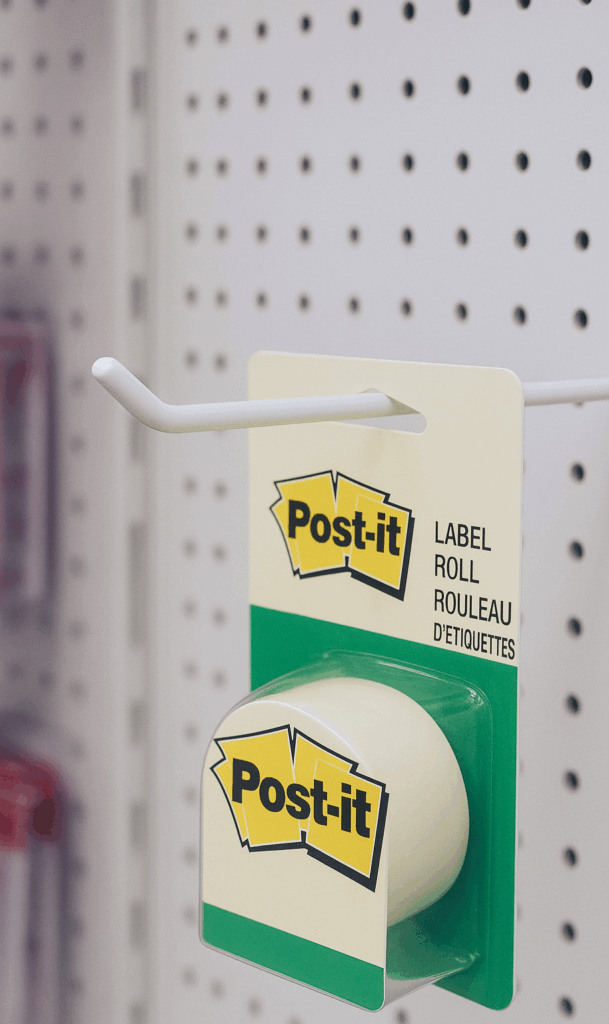
Optional Accessories (e.g., IDMATE Plastic Display Hooks)
Accessories make slatted walls more practical and aesthetically pleasing. IDMATE plastic display hooks are a clever way to organize displays. They are suitable for slatted walls, pegboards, and grid walls. These hooks help keep items neat and organized for easy access.
| Advantage | Description |
|---|---|
| Flexible Layout Rearrangement | You can move hooks to fit different products. |
| Surface Protection | Stops scratches and dents, so panels stay looking new. |
| Durable Material | Made from strong ABS plastic. They are safe and have no sharp edges. |
Installers use these accessories to make displays look good and stay neat. With the right tools and materials, anyone can build a slat wall that lasts.
How to Install Slat Wall Panels: Preparation
Measuring and Planning
Good planning is fundamental to building a sturdy slatted wall. Installers always begin by selecting a suitable wall surface. They will check if the wall can support the weight of the slatted wall and if the installation location has sufficient natural light. Next, they will use a tape measure to measure and record the total height and width of the area. This step helps them determine the required number of slats. They will also check for any decorative strips, moldings, or other items that might obstruct the installation.
Tip: Order about 10% more material than you anticipate. This can compensate for some errors and losses due to minor cuts.
Installers will use a level or laser level to ensure the first slat is installed straight. A straight starting point ensures a neat and aesthetically pleasing wall. They will plan the placement of each slat and decide whether any parts need to be cut. Careful planning saves time and avoids material waste.
Marking Studs and Outlets
Locating the wall posts is crucial. Wall posts provide strong support for the slatted wall. Installers will use a wall post detector and mark the location of each wall post with a pencil. They will also look for outlets, switches, or pipes. Marking these locations helps avoid accidents during installation.
- Mark all wall posts from top to bottom.
- Outline the locations of sockets and switches with a pencil.
- Carefully check dimensions before drilling.
Missing wall posts or sockets can lead to weak points in the wall or misaligned panels. Careful marking ensures everything is secure and stable.
Prepping the Wall Surface
A clean wall surface helps the panels adhere firmly. Installers will remove old nails, screws, and cracked paint. They will wipe the wall to remove dust and dirt. If it’s a brick or concrete wall, they may use an adhesive primer or add a backing board to increase friction.
- Remove any loose or protruding objects.
- Mark the position of each panel using a level or chalk line.
- Check that edges and seams fit tightly.
Good preparation means a clean-looking panel and a longer lifespan. A smooth wall surface makes the work easier and yields better results.
Attach a Slat Wall: Step-by-Step Guide
Install on Drywall with Studs
Attaching a slat wall to drywall with studs gives the best support. Many people start their diy slat wall project by finding the studs. He uses a stud finder and marks each stud along the wall. She checks the layout and marks where the grooves of the slatwall panels line up with the studs. This step helps avoid mistakes later.
Here is a simple process for slatwall installation:
- Measure the wall and mark the stud locations.
- Transfer these marks to the grooves on the slatwall panels.
- Level the first panel before attaching it.
- Drill screws through the grooves into each stud. Space screws every 12 to 16 inches vertically.
- Use at least 24 screws per panel for strong support.
- If the bottom edge does not sit on the floor, install a ledger board to hold it up.
- Stack each panel on top of the last one, working from the floor to the ceiling.
- For extra strength, apply panel adhesive to the back of each panel before screwing it in.
Tip: Always check the first panel for level. All other panels will line up from this one.
He avoids drywall anchors because they do not hold heavy loads well. She uses screws that are 2.5 to 3 inches long for a secure fit. This method helps install slatwall panels that stay strong for years.
Install on Masonry or Concrete
Some people want to attach a slat wall to brick or concrete. This process needs special steps. He starts by cleaning the wall. She makes sure the surface is dry and smooth. They use a bonding primer or add a backer board for better grip.
Here are the steps for slatwall installation on masonry:
- Clean and level the wall before starting.
- Use masonry screws and anchors to attach the panels.
- Mark where each screw will go, making sure they line up with the grooves.
- Drill holes for the anchors and insert them.
- Place the wood slat panels and drive screws into the anchors.
- For extra hold, use construction adhesive on the back of each panel.
Note: He checks the wall for bumps or cracks. She fixes any problems before installing slatwall panels.
This method works well for people who want to install a wood slat feature wall in a basement or garage. It also helps anyone working on a diy wood slat wall.
Using Screws vs. Adhesive
The choice between screws and adhesive depends on the wall type and the weight you plan to hang. He typically uses screws to install slatted walls. Screws provide optimal support, especially when securing the slatted wall to the joists. She avoids using drywall anchors, using adhesive only when additional reinforcement is needed, not as the primary support.
Here is a brief comparison table of screws and adhesives:
| Method | Best Use | Safety | Load Capacity |
|---|---|---|---|
| Screws | Drywall with studs | Very secure | High |
| Adhesive | Extra support, smooth walls | Good with screws | Medium |
| Masonry Anchors | Concrete or brick walls | Secure | High |
Callout: He always checks the weight capacity of the panels. She uses high-quality hooks for heavy items. Proper installation makes the slatwall safe and strong.
People avoid common mistakes by measuring carefully and finding studs. He leaves space for natural expansion and contraction. She checks each panel for level and plumb. These steps help install slat wall panels that look good and last a long time.
Many people use wood slat panels for a diy slat wall project. They follow the slatwall installation process to make sure everything stays safe. He uses IDMATE Plastic Display Hooks to organize displays. She likes how these hooks protect the surface and keep things neat.
Installing slatted wall panels is very simple by following these steps. Anyone can attach slatted wall panels to drywall, masonry, or concrete. He uses screws for strength. She uses adhesive for extra support. Together they create a sturdy and stylish wall suitable for any space.
Finishing Touches and Troubleshooting
Cutting for Outlets and Switches
Many people run into outlets or switches when installing slat wall panels. He can handle these obstacles with a few careful steps:
- Lay the panel face down on a flat surface.
- Mark the outlet location on the outlet box with paint or chalk.
- Press the panel against the wall to transfer the markings to the panel.
- Apply masking tape to create clean cut lines.
- Measure the distance from the floor to the outlet and mark it on the panel.
- Draw the outline of the socket on the back of the panel and double-check the dimensions.
- Drill a guide hole within the marked area.
- Cut along the line using a jigsaw. A utility knife can be used to assist with marking, making the cuts cleaner and crisper.
- Trial install the panel before actually installing it.
Cutting slat wall panels around outlets makes the installation look neat and professional. This step helps anyone working on a diy project for homeowners.
Trimming and Cleaning Up
Clean edges make the wall look finished. He uses the right tools for each type of cut. Here is a handy table for trimming tools:
| Tool | Purpose |
|---|---|
| Circular saw | For straight cuts |
| Table saw | Great for large panels |
| Miter saw | For angled cuts |
| Jigsaw | For curves or intricate designs |
| Clamps | To keep everything steady |
| Measuring tape | For accurate measurements |
| Pencil or chalk | To mark cut lines |
| Sandpaper (120-220) | To smooth edges for a professional finish |
| Safety goggles | For eye protection |
| Dust mask | To avoid inhaling dust |
| Ear protection | To protect hearing during cutting |
He uses a circular saw for straight cuts and a jigsaw for curves. She always clamps the panel before cutting. After trimming, they sand the edges for a smooth finish. They clean up dust with a vacuum or soft brush.
For cleaning, they dust the panels with a microfiber cloth. For grooves, a soft-bristled brush or vacuum works well. If there are smudges, a damp cloth with mild soap does the trick. They avoid harsh cleaners to protect the finish.
Final Inspection and Safety Tips
He checks every panel for stability. She gently tugs on each one to make sure it is secure. If a panel looks warped or misaligned, he uses a small pry bar to adjust it. For gaps, she uses tile spacers or a scrap piece of panel to close them.
Tip: Install panels in mild weather to avoid problems with expansion or contraction.
They dust the panels weekly and spot clean as needed. In high-traffic areas, they check for loose panels and keep humidity between 40% and 60%. They protect the wall from direct sunlight to prevent fading.
A final walk-through helps spot any missed screws or rough edges. He puts away tools and wipes down the area. She steps back and enjoys the finished wall, knowing the job is done right.
He can install a slat wall with confidence by following these steps:
- Plan the layout and design.
- Pick strong panels and quality materials.
- Clean and inspect the wall before starting.
- Gather all the right tools.
- Mount panels level and fasten them into wall studs.
She adds IDMATE Plastic Display Hooks to keep displays neat and easy to reach. These hooks come in many styles, so every item has a perfect spot. Anyone can create a secure, stylish wall and enjoy a tidy space.
FAQ
How to determine if your wall is suitable for slatted wall installation?
He will use a wall detector to check the wall joists. She will tap the wall to listen for solid sections. If the wall feels weak or hollow, he will add extra support before installing the slatted wall.
What size screws are best for slatted wall panels?
Installers typically use size 8 or 10 screws, 2.5 to 3 inches long. These screw sizes work for most slatted walls and provide a strong support. He always checks the slatted wall installation instructions to find the most suitable screws.
Can slatted walls be installed on concrete or brick walls?
Yes. He will use masonry anchors and screws to ensure a secure fit. She will apply construction adhesive to enhance adhesion. He always cleans and levels the wall surface before starting installation.
Why choose IDMATE plastic display hooks for slatted wall installation?
He likes IDMATE hooks because they work on slatted walls, pegboards, and grid walls. She found them sturdy, lightweight, and easy to move. These hooks helped keep the displays neat and secure.