To ensure labels adhere firmly to plastic, you must first prepare the surface, then apply the label by hand and allow the adhesive to dry. Careful handling contributes to a beautiful and durable label. Many people experience labels peeling, bubbling, or fading because plastic is difficult to adhere to and easily bends. Sometimes, air pockets or uneven surfaces can exacerbate this. Following the correct steps can prevent these problems and result in beautiful, long-lasting self adhesive labels.
Key Takeaways
- Clean the plastic surface with mild soap and dry it thoroughly. This helps the label adhere better.
- Choose labels and adhesives suitable for your plastic material. This prevents labels from peeling and fading.
- Apply the label slowly. Start from the center and smooth out towards the edges. This prevents air bubbles and wrinkles.
- Let the adhesive dry for 24 hours before use. This allows the label to adhere more firmly and last longer.
- Store labeled items in a cool, dry place, away from direct sunlight. This helps maintain the label’s appearance and extends its lifespan.
Gather Materials for Putting Labels
Essential Supplies Checklist
Before you begin labeling, make sure you have all the necessary supplies ready. This will help improve efficiency and extend the lifespan of your labels. Here is a simple checklist for your reference:
| Material Type | Key Benefits |
|---|---|
| Biaxially Oriented Polypropylene (BOPP) | Very transparent, available in gloss or matte finishes for a beautiful appearance |
| Vinyl(PVC) | Very strong, water-resistant, suitable for damp environments |
| Polypropylene(PP) | Water, oil, and chemical-resistant, suitable for environments with frequent handling |
You may also need the following items:
- Clean cloth or paper towels
- Mild detergent
- Acetone (for cleaning stubborn stains)
- Handheld labeler or label applicator
- Scraper or credit card (for smoothing labels)
- UV-resistant ink or coating (for outdoor use)
Tip: When purchasing labels, look for UL certification or the UL approval mark. These marks indicate that the labels are safe to use.
Choosing the Right Label and Adhesive
Choose the most suitable labels and adhesives based on your plastic material and the environment in which you will be using them. Polyethylene and polypropylene plastics require special adhesives. These adhesives are better suited for smooth plastic surfaces. TenaciousTac® is a strong adhesive. Sometimes, you may need to use an adhesion promoter to help labels adhere, especially when labels are difficult to apply.
If you are using labels outdoors or in a damp environment, consider the following:
- Ensure the adhesive is suitable for your plastic material.
- Choose an adhesive that is resistant to low temperatures.
- Use UV-resistant inks to prevent labels from fading.
- Choose an adhesive that will not be damaged by cleaning agents.
Synthetic labels such as polyester or vinyl fade more slowly in sunlight than paper labels. A UV-resistant coating helps protect labels from sunlight and slows down their damage. Polyethylene labels are flexible and will not be damaged by water. PET labels are strong and clear.
If you are labeling by hand or using a handheld labeler, ensure the label color matches the plastic surface. If you need to label a large number of labels, it is recommended to use a labeling machine. This will speed up the labeling process and ensure all labels look consistent.
Prepare Plastic Surface for Labels
Cleaning and Drying Tips
Cleaning the plastic surface is the first step. Dirt, grease, or fingerprints can affect label adhesion. Always wipe plastic surfaces with a soft cloth and a mild detergent. Mild detergent and water can remove most dirt and grease. For stubborn stains, use isopropyl alcohol or a vinegar solution. These cleaners remove sticky residue without damaging the plastic.
Tip: Do not use strong cleaners, bleach, or ammonia. These substances can scratch or discolor the plastic surface. Scratches will make labels difficult to adhere firmly.
The following table shows how cleaning can help labels adhere better:
| Cleaning Method | Effectiveness on Adhesion Strength |
|---|---|
| Mild detergent and water | Suitable for most cleaning jobs |
| Isopropyl alcohol | Highly effective on stubborn stains |
| Nylon scrub brush | Helps clean uneven surfaces |
| Kitchen spray cleaner | Cleans stubborn dirt or grease |
| Glass cleaner | Cleans stubborn stains |
After cleaning, be sure to dry the surface completely. Water can clog the adhesive, leading to mold. Dampness can soften the adhesive. While it may help initially, it will weaken the adhesion later. For best results, operate in a room with 45% humidity. Maintain a temperature close to 70°F (approximately 21°C).
Using Acetone for Better Adhesion
Some people use acetone to help labels adhere. This method works best on smooth or glossy plastics. Acetone can alter surfaces, but it doesn’t always enhance adhesion. Studies have shown that acetone can make surfaces too smooth, thus reducing label adhesion. Test on an inconspicuous area first. Only use acetone if other cleaning agents are ineffective.
- Acetone makes surfaces less rough, which is detrimental to label adhesion.
- It does not promote chemical changes to enhance adhesion.
- Using too much acetone can damage the appearance of plastic.
Before applying labels, allow the plastic and labels to reach room temperature. Store labels in a cool, dry place. Before use, let the labels sit at room temperature for a day. This step helps the labels adhere better and extends their lifespan. This is especially important when labeling by hand.
Applying Labels by Hand
Align and Position Your Label
Placing labels in the correct position is crucial. People often rush through this step, but taking the time will make the labels look neater and more professional. Here are some simple tips to ensure accurate label alignment:
- Lightly draw guide lines on the plastic sheet with a pencil or washable marker. These marks help keep the labels straight.
- Hold the label above the surface to check its position before pasting it. This ensures the label aligns with edges or other labels.
- Press one edge or corner of the label onto the plastic sheet first. This gives you the opportunity to adjust the position as needed.
- For larger labels, ask someone to hold down the other side. This prevents the label from folding or pasting in the wrong place.
Tip: Using a handheld or manual label applicator can achieve better alignment. These tools help keep labels straight and speed up the pasting process.
When dealing with curved or irregularly shaped items, it’s helpful to use a soft ruler to measure the surface dimensions. Some people even make paper templates to test the fit before pasting the label onto the actual item. This extra step saves time and avoids mistakes.
Apply Your Label Without Bubbles
Nobody likes air bubbles or wrinkles under labels. They make the label look messy and make it easy to fall off. Here’s how to apply a label smoothly:
- First, press the center of the label onto the plastic. Use your thumb to smooth the label outwards towards the edge. This inside-out method removes air bubbles, keeping the label flat.
- Use a scraper, credit card, or clean, dry cloth to flatten the label. Press from the center outwards. This helps remove any remaining air, leaving the label smooth and wrinkle-free.
- If you find air bubbles, gently lift the label and smooth it out. Take it slow—slow, steady pressure works best.
- For curved surfaces, roll the item onto the label instead of sticking the label to the item. This helps the label conform to the shape of the curved surface and adhere evenly.
Here are some useful tools for applying labels:
| Tool/Accessory | Purpose/Function |
|---|---|
| Squeegees | Presses the vinyl material evenly onto the surface, avoiding scratches and ensuring a smooth fit. |
| Heat Guns | Softens the vinyl material, allowing it to better conform to curved surfaces and activates the adhesive, ensuring a strong bond. |
| Gloves | Protect your hands and vinyl materials from oil and cuts, ensuring a cleaner labeling process. |
Note: If you’re using a labeling machine to label multiple items, you’ll achieve a consistent, bubble-free labeling result every time.
Manual labelers typically follow these steps for best results. They work patiently, use appropriate tools, and check the labeling process regularly. This helps extend the lifespan of the labels and maintain their appearance.
Set and Cure Label for Durability
Press and Smooth the Label
After applying the label to the plastic, it needs to be pressed flat. Press it down from the center outwards with your hand or a scraper. This removes air bubbles and helps the label adhere smoothly. If you don’t have a scraper, a credit card can also be used. Applying even pressure helps the adhesive adhere better to the plastic. If air bubbles appear, lift the edge and try again. Patience will result in neater labels and greater durability.
Tip: Wearing gloves prevents oil stains from getting on the labels and helps you apply them cleanly and neatly.
Allow Adhesive to Set
Allowing the adhesive to dry is crucial for extending the lifespan of the labels. Most adhesives require some time to fully cure. Here is a simplified chart:
| Adhesive Type | Curing Time Description |
|---|---|
| General-purpose | Approximately 10-15 minutes to cure |
| Removable | No cure time required; may be difficult to remove afterward |
| Freezer grade | Suitable for low-temperature environments; no cure time required |
For best results, wait at least 24 hours before touching or moving the item. During this time, keep the item away from water and environments with drastic temperature changes. Water can cause the adhesive to lose its stickiness, leading to label swelling or blurry printing. Cold air slows drying and creates water droplets, making application more difficult. Low temperatures can also cause labels to crack or break.
- Choosing the right adhesive side helps prevent water stains.
- Labels may bend or detach when temperatures fluctuate drastically.
- A printed protective layer ensures the text remains clearly visible even when items are damp.
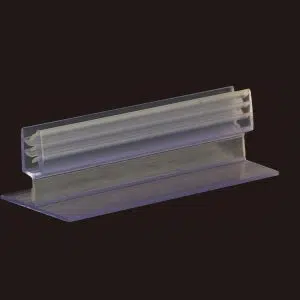
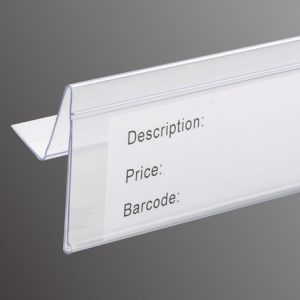
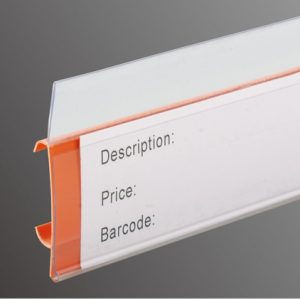
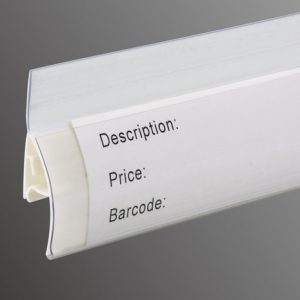
Stores and offices sometimes use label holders or data strips instead of self-adhesive labels. These holders clip onto shelves for quick label changes. Magnetic label holders are suitable for metal shelves and are reusable. This saves time, allows for quick price updates, and keeps shelves tidy.
Note: Using data strips or label holders makes label changes easy and keeps shelves tidy.
Handling carefully while the adhesive side is drying helps labels adhere firmly and maintain their appearance.
When applying labels to plastic, following the correct steps yields the best results. First, clean and dry the surface. Then, choose the appropriate label and adhesive. Pressing and smoothing the label helps it adhere firmly. Allowing the adhesive to dry completely will result in a more secure and clear label. For lasting results, store labeled items in a cool, dry place, away from direct sunlight. If you need to remove or replace a label, use gentle methods such as wiping it with alcohol or heating it with a hairdryer. These steps help keep labels neat and legible.
Tip: Always test adhesives and storage conditions to ensure labels are clearly visible.
- Store labeled items in their original packaging.
- Avoid direct sunlight and high temperatures.
- Use a primer for printing for extra protection.
Quick Removal Methods:
- Soak in alcohol.
- Heat with a hairdryer.
- Try using a dedicated removal product.
FAQ
How do I apply labels to plastic using a machine?
Machines can quickly apply labels to plastic. They align the label and press it firmly. This method works for a variety of items. Machines prevent air bubbles and keep labels flat.
Which types of labeling machines are best for plastic labels?
People can choose from handheld, semi-automatic, or fully automatic labeling machines. Each machine has its own characteristics. Some are better suited for flat items, while others are better suited for curved items. The best choice depends on the label size and type of plastic.
Can the machine prevent air bubbles from forming under the label?
Yes. Machines can smoothly press labels onto plastic. They use rollers or scrapers to expel air, keeping the label flat. Using machines for labeling not only results in a more aesthetically pleasing finish but also extends the label’s lifespan.
Can machines be used to label curved plastic surfaces?
Machines specifically designed for curved surfaces can. Some machines roll the item onto the label, helping to ensure a perfect fit. Machines also prevent folds and wrinkles.
Why do stores use machines to label plastic products?
Stores use machines for labeling because it saves time. Machine labeling is faster than manual labeling and ensures label consistency. Machines can also handle large volumes of work, making everything easier and more convenient.